Fashion Photography Services



E-commerce Photography
A practical, product-first workflow for editors, brands and catalogue teams that need clean lingerie images without misrepresenting fabric, colour, fit or construction.
Quick answer
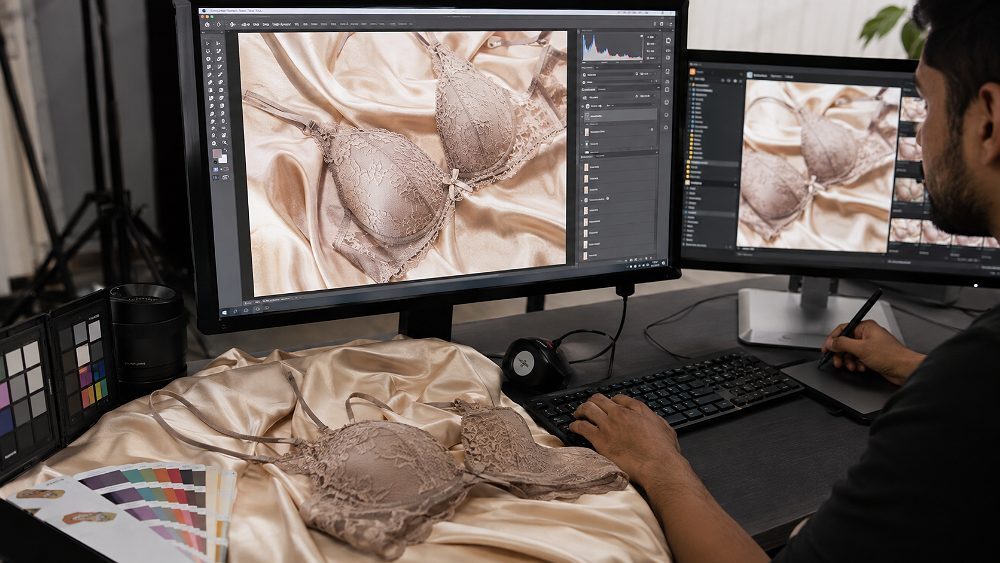
Lingerie photo retouching should remove photographic distractions such as lint, temporary wrinkles, skin blemishes and background imperfections, while preserving the garment’s real colour, construction, fabric texture, stitching, shape and fit. Everything shown online must match what the customer actually receives.
Lingerie images are held to a stricter standard than most other apparel categories. A single reshaped cup, a flattened lace pattern, or a slightly warmer beige can turn a legitimate product photo into a misleading listing. In this guide, Prince and the Ckstudio editorial team walk through a product-safe approach to lingerie photo retouching — the same workflow used behind the scenes on boudoir and lingerie photography projects for D2C intimate wear labels.
The intent is simple: clean the image, protect the product. Whether you sell bralettes, seamless briefs, shapewear, babydolls or bikini sets, the retouching decisions should always improve the presentation without redesigning the actual garment. That single rule is what separates catalogue-quality editing from image manipulation, and it is where most ecommerce brands quietly lose customer trust.
Key takeaways
The very first decision in any lingerie retouching brief is defining the boundary between presentation cleanup and product manipulation. Presentation cleanup is safe. It fixes what the camera captured badly — a piece of lint on satin, a temporary crease pulled during styling, or a sensor spot on the background. Product manipulation is unsafe. It changes something the customer will actually notice when the parcel arrives.
At Ckstudio, we approach every intimate wear image as a legal representation of the garment. That mindset matters more in this category than in almost any other. Brands like Clovia, Zivame, Nykd by Nykaa and Enamor compete on subtle fit differences, lace patterns and finish quality, and shoppers routinely zoom to check stitching before buying. Retouching should support that scrutiny, not defeat it. Our full workflow is documented alongside the lingerie ecommerce photography complete guide and the undergarment photography ecommerce guide.
The most abused tool in intimate apparel retouching is the liquify filter. It is tempting to slim a band, deepen a cup, or narrow a strap to make a photo look neater. Each of those edits, however, silently changes the product. A shopper who orders a bra expecting a slim-cut band will not be forgiving when the delivered piece looks broader on the body.
Preserve cup size and cup depth exactly as shot. Keep band width, strap dimensions and neckline coverage untouched. Do not create artificial waist compression on bodysuits or shapewear pieces. Seams, panels and lace edges must sit where the actual construction places them. For brands like Amante, Jockey Women and Shyaway that publish detailed size guides, any silhouette change in a photo directly contradicts the technical spec sheet.
The table below is the working reference our editors use before every intimate wear job. Anything in the left column is a routine fix; anything in the right column requires a fresh shot instead of a retouch.
| Safe to correct | Do not misrepresent |
|---|---|
| Dust, sensor spots, lint on fabric | Cup shape, padding thickness, moulding depth |
| Temporary styling wrinkles | Strap width, band height, hook count |
| Minor loose fibres and stray threads | Coverage, neckline depth, side coverage |
| Background defects and edge cleanup | Lace pattern, embroidery placement, motifs |
| Small skin blemishes and colour patches | Material transparency and mesh openings |
| Exposure inconsistencies across the frame | Stitch placement, seam lines, panel joins |
| Colour cast from mixed light sources | Actual garment colour, tone and variant shade |
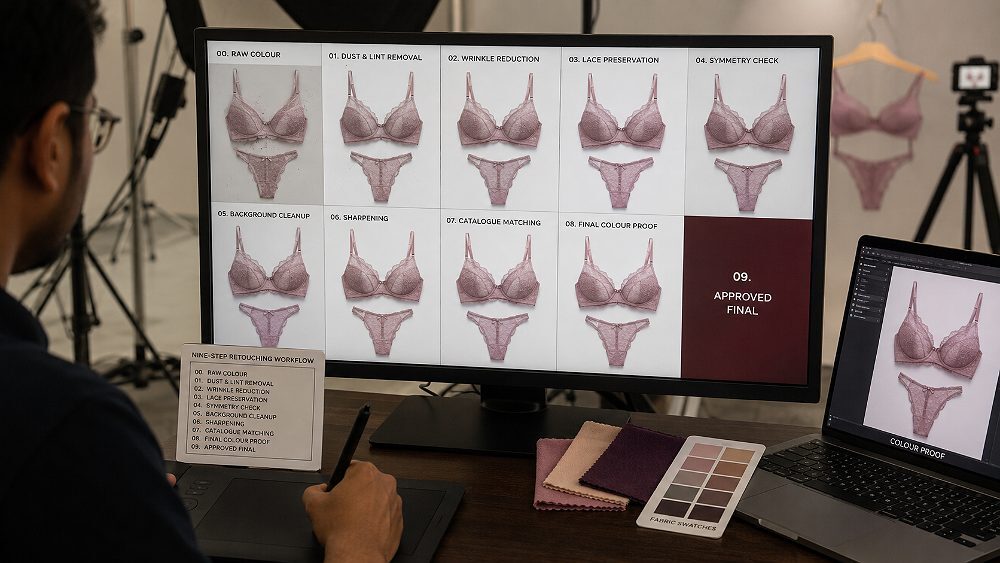
This is the core workflow used on daily catalogue jobs at Ckstudio. It is deliberately built as a numbered sequence, because the order matters — RAW-stage colour decisions influence how every subsequent brush stroke, dodge and clone behaves. Skipping straight to skin work before neutral colour is set is the fastest way to introduce shifts that no one notices until the images go live.
The nine steps below map to a typical intimate wear image: whether it is a flat-lay panty set for Meesho, a ghost mannequin bralette for Amazon India, or a full boudoir-styled shot for a D2C brand campaign. For pure garment-only imagery, the same logic is used in our lingerie photography services ecommerce guide, which pairs well with this retouching pipeline.
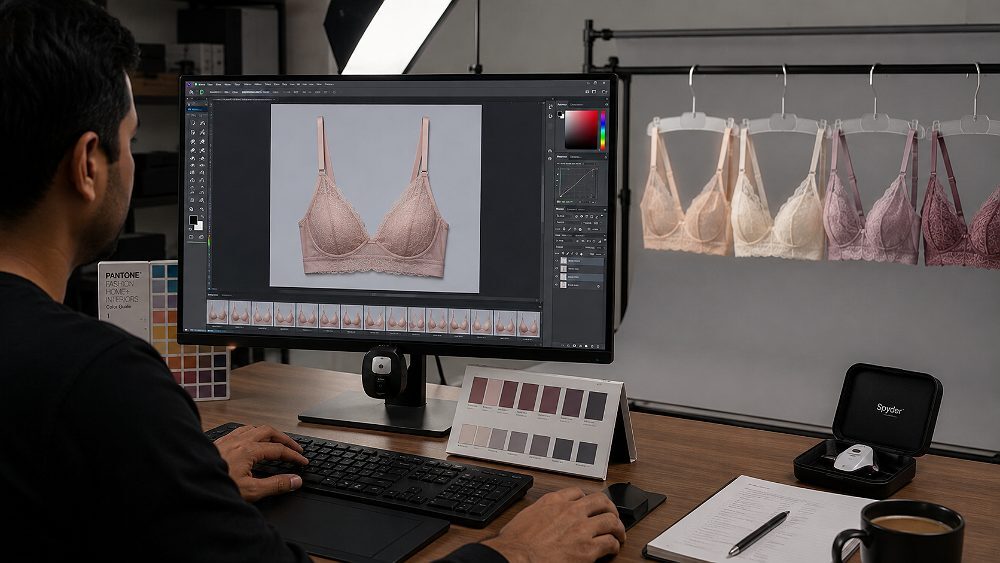
Open the RAW file, set the white balance from a grey card frame that was shot on the same setup, and correct exposure to the mid-tones. Keep contrast conservative at this stage — pushing it too far now will make lace lose depth later. Compare the on-screen preview against the physical garment when possible; a swatch on the desk is worth ten opinions across a Slack thread.
Work in a calibrated 16-bit workflow if you plan to touch skin or fabric gradients. Convert to the working colour space at the RAW stage, not after retouching, so that every downstream edit lives inside the correct profile. This step alone protects the true colour of a nude bralette or a wine-toned bodysuit better than any hue slider ever will.
Zoom to 100% and work section by section with a small healing brush. Target visible dust, sensor spots on the seamless, and small fibres clinging to satin or mesh. If a loose thread hangs off a seam, remove it; if a thread is stitched into the design, leave it alone. Editors new to intimate wear often mistake decorative micro-threads on lace edges for defects and clone them out — this quietly changes the pattern.
Use frequency separation only where fabric texture is uniform, such as smooth satin or matte cotton. On lace, embroidery or ribbed weaves, prefer local clone and heal work; frequency separation will smear the pattern. This is the same approach our editors use when retouching garment photoshoot deliverables for D2C brands.
Not every crease is a defect. On lingerie, three fold types are legitimate and should stay: natural fabric drape, construction folds at the underwire or gusset, and stretch tension where the garment sits on skin or a mannequin. What should be reduced are styling-induced creases — sharp fold lines from packaging, temporary wrinkles from pinning, or steam residue.
The safest technique is dodge-and-burn on a mid-grey layer set to soft light. This lifts the shadow of a wrinkle without cloning any fabric texture away. If a crease is so severe that dodge-and-burn cannot save it, that is a signal to restyle and re-shoot rather than to Photoshop it. Over-flattened satin instantly reads as fake, and shoppers who have handled real lingerie online will spot it.
Lace, mesh and embroidery are the fingerprints of an intimate wear product. Brands like Victoria’s Secret India, Enamor and Sinderella build entire collections around specific lace motifs; a customer who screenshots your product image and later compares it to the delivered piece is looking at exactly this detail. Any editing pass must protect the pattern first and clean second.
When cleaning near lace, work with a hard-edged brush at low flow, and always sample from an adjacent identical motif rather than from a plain area. For mesh, do not fill transparent openings even if the background peeking through looks messy — that transparency is the product feature. On embroidery, respect the raised texture; the goal is a clean edge, not a smoothed one.
Sheer panels, mesh insets and lace overlays are transparent by design. Increasing opacity to hide skin makes the garment look denser than it actually is, which is misrepresentation. Reducing opacity to appear sexier is equally wrong for an ecommerce listing. Match the on-screen transparency to what the camera captured under correct exposure, and let the shopper judge the coverage from a photograph that tells the truth.
If a strap has twisted during shooting on a garment that is designed symmetrically, straightening it is fair. If the design itself is asymmetric — a knotted bralette, an off-shoulder babydoll, a single-shoulder bodysuit — leave the asymmetry alone. The retouching brief is to fix photography artefacts, not to enforce a symmetric silhouette on a product that was never symmetric.
Avoid using liquify to sculpt the outline of the garment. A subtle warp to fix a pulled seam is acceptable; reshaping the entire cup outline is not. If the same silhouette issue keeps recurring across a shoot, the fault is at the styling table, not on the retoucher’s timeline.
A consistent, dust-free background is a marketplace requirement, but the natural contact shadow under the garment must stay. Removing shadows entirely creates a floating-product look that reads as cut-out artwork rather than a real photograph. Clean the background around the edges, remove sensor spots, and neutralise any colour cast from bounce light — but preserve the soft shadow that tells the eye the item was actually there.
The same principle applies to model shots: keep the contact shadow between skin and garment where a strap or elastic sits, because that shadow communicates fit. Erasing it makes the strap look painted on. For ghost mannequin lingerie work, our detailed approach is covered in the lingerie model vs ghost mannequin ecommerce guide.
Sharpening on lingerie is best applied selectively. Boost detail on lace, embroidery and stitching, but leave skin at a gentler setting. Global unsharp mask across the whole frame will create halos on curved edges and crunchy artefacts on smooth satin. Use output sharpening only after resizing to the final ecommerce dimensions.
Export to sRGB for web display, keep the JPEG quality high enough to preserve fine mesh detail, and verify the file size fits the platform’s upload limits. Consistent export presets across a full catalogue matter as much as any single retouch decision — this is where a lot of brands lose visual continuity between images shot in different weeks.
An individual image can be beautifully retouched and still fail its job if the SKU next to it on the category page looks tonally different. Once a single hero image is signed off, that file becomes the reference for every related variant — same white balance, same shadow density, same crop, same retouch depth. Catalogue-wide consistency is what makes a category grid feel like one brand.
Before delivery, place the exported JPEG on a calibrated screen next to the actual garment under a daylight-balanced desk lamp. If there is a visible mismatch in tone, saturation or texture, iterate. This last physical check is what separates ecommerce-grade retouching from generic photo editing and is a non-negotiable stage in the Ckstudio delivery pipeline.
Every intimate wear category has its own risk profile in retouching. A bra needs cup and underwire respect. A pair of briefs needs waistband and leg opening respect. A bodysuit needs panel and closure respect. Grouping them into a single generic workflow is where most editing services lose product accuracy. The subsections below break the approach down by garment family.
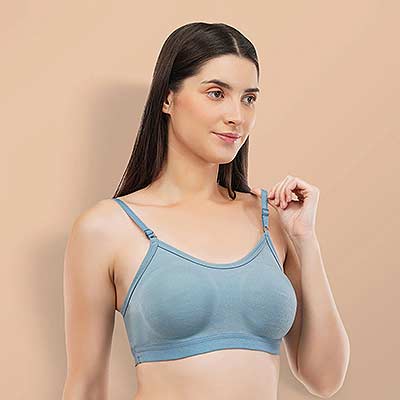
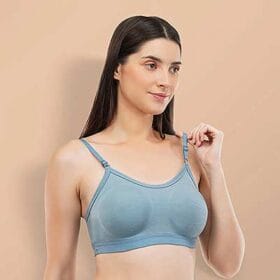
Bras are the highest-risk item in the category. A one-millimetre reshape of a cup edge changes perceived volume, and shoppers who read Amante or Enamor size guides carefully will notice the discrepancy. Focus retouching on distraction cleanup: dust on the moulded cup, temporary strap twists from the shoot, small lint on the underwire channel.
Do not smooth the cup contour beyond what the light naturally shows. Do not reshape underwire curvature. Do not narrow or thicken straps, even by a few pixels — this is a legal size specification for many D2C brands. If a bralette is designed with a soft, unmoulded cup, keep it unstructured; adding artificial roundness turns the product into something it is not.
For panty sets and briefs, the retouching risks live at the waistband, leg openings and gusset area. Do not narrow the waistband to look sleeker — that width is a size specification. Do not smooth away the gusset construction; it is a functional feature that customers look for. On seamless briefs sold by brands like Nykd by Nykaa and Jockey Women, do not clone away the subtle bonded edge — that is the entire selling point.
Shapewear is even more sensitive. Compression panels create visible structure lines through the fabric, and those lines are what buyers evaluate. Retouching them out to make a piece look smoother will directly increase return rates. Consistency across the shapewear catalogue is easier to maintain when a single reference image locks the retouch depth for every subsequent variant.
Bodysuits and lace sets combine every retouching risk into one file: cup construction, panel joins, lace patterns, mesh transparency, closure hardware and coverage design. The safest editing approach is a layered, non-destructive pass where each fix lives on its own layer and can be reduced or removed if the reviewer flags it.
Protect the panel structure and closure design. Preserve lace repeats — if the pattern repeats every five centimetres, that spacing needs to survive the retouch. On babydolls and loungewear pieces with decorative trims, keep every embellishment intact. Complex intimate apparel is where the difference between generic editing and specialised professional image editing services becomes obvious in the final catalogue.
Model imagery is where beauty retouching and product accuracy meet head-on. A photographer’s instinct is to smooth skin and sculpt bodies; an ecommerce retoucher’s job is to protect the product story. Both can coexist if the retouch stops at the garment line. Blemishes, uneven tones and photographic distractions on skin can be gently refined. What must not happen is body reshaping that changes how the lingerie appears to fit, support or shape.
Keep realistic skin texture. Balance uneven tones without over-smoothing. Do not narrow the waist if it changes the tension on a waistband. Do not enlarge or reduce the bust if it changes how a bra sits. Do not erase realistic strap pressure marks — they are proof of fit, and shoppers reading brand fit-guides expect to see them. This is the same principle applied on our editorial model photoshoot deliverables for lingerie brands.
Rule of thumb: Skin retouching becomes product manipulation the moment an edit changes how the lingerie appears to fit, support, cover or shape the body — rather than simply improving photographic presentation of the skin itself.
Practical test: cover the model’s face and body in your review, and look only at the garment silhouette. If the silhouette looks different from your original shot, a body edit has pushed into product territory and must be reversed. This one-minute check catches most misrepresentation issues before they leave the retouch desk.
Colour is where intimate wear brands make and lose the most money. Shoppers distinguish between nude, blush, beige, ivory, wine, mauve and dusty pink on subtle tonal differences. A retouch pass that shifts a nude by five points on the hue slider can turn a satisfied customer into a return. The fix is a strict colour-managed pipeline, not a good eye alone.
Use a calibrated display, neutral white balance from a grey card, and physical fabric reference on the desk during colour work. Isolate skin tone from garment colour with selection masks before pushing saturation. Export to sRGB for web with an embedded profile, and always cross-check the final on at least two different devices. The full end-to-end approach is documented in the ecommerce image optimization guide.
A global saturation or hue push affects everything on the frame simultaneously: skin, lace, metal hardware, background and decorative trims. A five-point saturation lift that looks flattering on the bralette also warms the model’s skin, pulls the background off-neutral, and shifts the silver hardware toward gold. The safer route is to always work with masked, local adjustments and reserve global moves for the RAW stage only.
For brands like Clovia, Shyaway and Zivame that ship dozens of tonal variants of the same silhouette, colour discipline in retouching is what protects the return-rate metric. When two adjacent variant thumbnails look tonally identical, the whole variant strategy collapses.
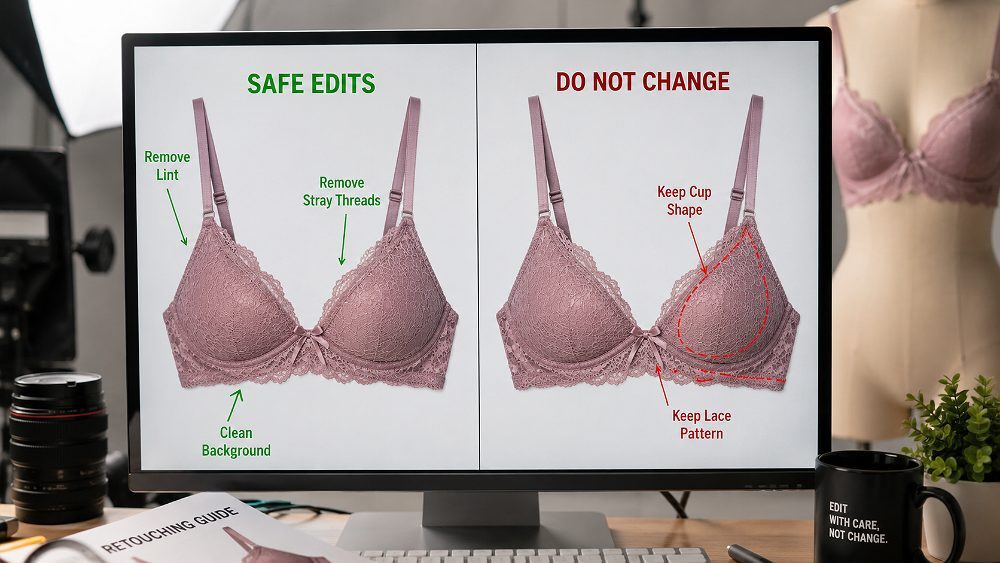
Most retouching failures are not exotic — they are the same seven mistakes, repeated across brands and marketplaces. The list below is what Prince and the Ckstudio team flag most often when auditing existing intimate wear catalogues before onboarding a brand.
Each mistake has a shared root cause — treating lingerie retouching like generic beauty retouching. The category needs its own rulebook, its own reference images and its own QC pass. That is why we treat retouching as an extension of shoot planning, not as a separate service, and why our lingerie product photography ecommerce images pipeline includes editing sign-off from the same shoot lead.
Every final image must clear two checklists before it goes to the client folder — one for product accuracy and one for technical quality. These are the same lists our editors sign against on every intimate wear delivery. Missing even one line is treated as a re-open, not a small fix.
Every Indian marketplace has slightly different image expectations, but the underlying discipline is the same — consistent framing, clean background, accurate colour and multiple product views. What changes is the acceptable background style, the minimum resolution, and the number of variant images required per listing. Sellers should always confirm the current platform-specific requirements from official documentation before final export.
For structured platform guidance, the Amazon Seller Central India resources and the Flipkart Seller Hub are the authoritative sources for image rules. Retouching decisions should always flow from the platform requirement, not the other way around. Our seller-side notes are captured in the Amazon product photography complete sellers guide and the Meesho product photography beginners guide.
For Myntra and Ajio listings specifically, colour accuracy and model-fit realism are the two dominant scoring dimensions in customer reviews. A retouched image that softens fit information will move a listing from four-star to three-star territory within weeks. Our full marketplace-side approach is documented in the Ajio seller image guidelines and the Flipkart photography guidelines.
The gap between basic photo editing and professional intimate wear retouching is not a matter of software or hours. It is a matter of decision framework. Basic editing improves how a photo looks; professional lingerie retouching improves how a photo looks while protecting product truth. The table below breaks down where the two workflows actually diverge.
| Feature | Basic Editing | Professional Lingerie Retouching |
|---|---|---|
| Exposure correction | Global slider | RAW-stage with reference frame |
| White balance | Auto or eyeballed | Grey-card sampled and profile-matched |
| Background cleanup | Blanket erase | Cleaned while preserving contact shadow |
| Lint and dust removal | Broad heal brush | Localised at 100% zoom, texture protected |
| Wrinkle cleanup | Aggressive clone | Dodge-and-burn, drape preserved |
| Lace preservation | Often smeared | Pattern-sampled, motifs intact |
| Skin retouching | Global smoothing | Frequency separation with texture kept |
| Colour matching | Guessed by eye | Verified against physical garment |
| Shape preservation | Liquify used freely | Silhouette locked to RAW capture |
| Catalogue consistency | Image-by-image | Reference-locked across every SKU |
| Detailed QC | Single reviewer pass | Two-checklist sign-off before delivery |
Pricing for intimate wear retouching in India is best structured around the depth of work rather than the number of clicks. A basic clean-up of a well-shot flat lay costs a fraction of a full model shot with skin, fabric and colour work. The plans below reflect how brands typically budget these projects with Ckstudio; final quotes depend on shoot volume, turnaround and consistency requirements.
| Plan | Positioning | Retouching scope | Price display |
|---|---|---|---|
| Basic | Clean Product | Exposure, dust, background, minor cleanup | From ₹75 / image |
| Standard | Ecommerce Retouch | Fabric cleanup, colour correction, wrinkles, edges | From ₹150 / image |
| Premium | Model + Detailed Product | Skin work, lace preservation, garment detail, QC | From ₹300 / image |
| Enterprise | High-Volume Catalogue | Custom workflow, catalogue-wide consistency, bulk QC | Custom quote |
Request a lingerie retouching quote tailored to your catalogue volume and turnaround.
Get a Custom QuoteThe core operating principle at Ckstudio is that two edits can both look attractive while only one accurately represents the garment. We build every intimate wear pipeline around the second outcome. Prince runs the shoot-plus-retouch handoff personally on most lingerie catalogues, so the editorial team knows what the fabric actually looked like on set rather than guessing from the RAW file alone.
Colour consistency, fabric-detail preservation and catalogue-wide QC are the three deliverables our brand clients evaluate us on. Volume matters — we scale from thirty-SKU boudoir capsules to thousand-SKU marketplace refreshes without loosening the retouch standard. The full end-to-end shoot-plus-retouch approach is visible on our boudoir and lingerie photography service page, and detailed style guidance sits alongside the boudoir photography for ecommerce lingerie product images reference.
For brands ready to move fast, Prince is directly reachable — call +91-8700258773, message on WhatsApp at +91-8700258773, or send a shot list to [email protected] and we will scope the retouch plan against your live catalogue.
The single sentence to carry out of this guide is simple: improve the photograph, do not redesign the lingerie. Every technique, every checklist and every colour decision covered above serves that one rule. Ecommerce catalogues that respect it earn shopper trust, lower return rates and cleaner variant grids over time.
If your brand is planning a catalogue refresh, a new intimate wear capsule, or a full retouch audit of existing SKUs, the Ckstudio team can plan the workflow around your marketplace mix and volume. Reach out through the contact page or write directly to [email protected] — we will walk you through a sample retouch on one of your existing files before you commit to anything.
Lingerie photo retouching is the process of improving intimate apparel photographs by correcting colour, fabric distractions, backgrounds, skin and technical imperfections while preserving the garment’s real construction, texture, shape and fit. For ecommerce, it is the discipline of making an image cleaner without changing what the customer will actually receive.
Retouch temporary photographic imperfections such as lint, dust, minor styling wrinkles and skin blemishes, while leaving cup shape, straps, stitching, coverage, lace patterns, transparency, fabric texture and product colour unchanged. Every edit should improve presentation without altering how the lingerie fits, supports or covers the body.
Temporary styling wrinkles can be reduced with dodge-and-burn techniques, but natural fabric drape, stretch folds and construction creases should remain. Removing every crease makes lingerie look artificial and can misrepresent how the material actually behaves on the body.
Yes. Temporary blemishes, uneven tones and photographic distractions can be refined while retaining natural skin texture. Body reshaping through liquify should be avoided when it changes how the lingerie appears to fit, support or shape the body — that crosses from beauty retouching into product manipulation.
Colour accuracy helps shoppers distinguish closely related shades — nude, blush, beige, ivory, wine, mauve, dusty pink — and understand exactly what they are buying. Inaccurate editing makes fabric colours appear different from the physical lingerie, increases returns and damages the credibility of the brand’s entire variant strategy.
Basic clean-up on flat lay images typically starts around ₹75 per image, standard ecommerce retouching starts around ₹150 per image, and premium model-plus-detailed-product work begins around ₹300 per image. High-volume catalogues and enterprise workflows are quoted individually based on turnaround and consistency requirements.