
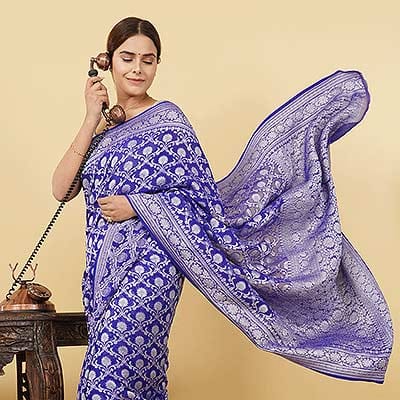
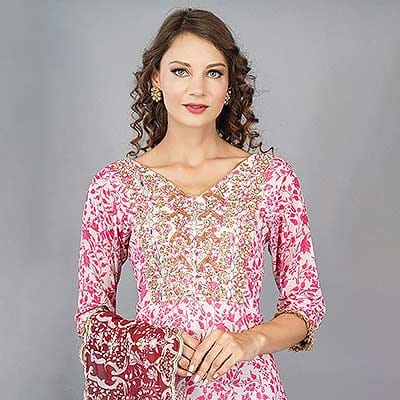
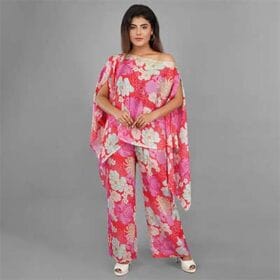
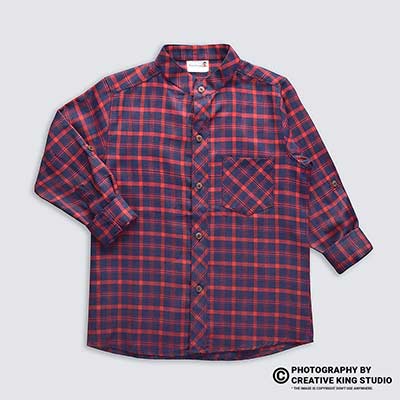
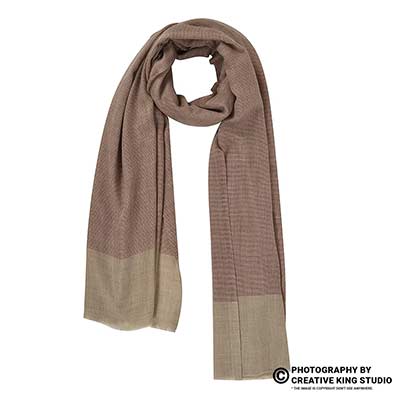
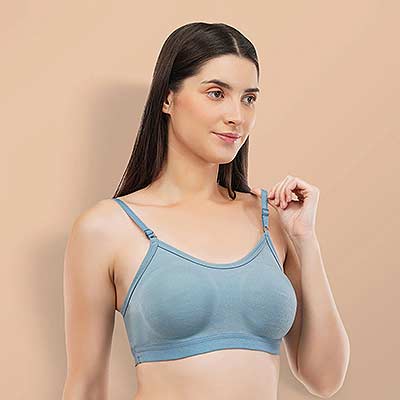
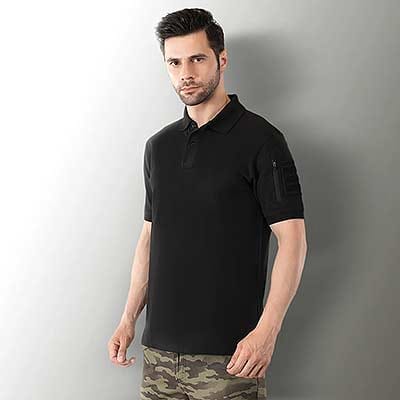
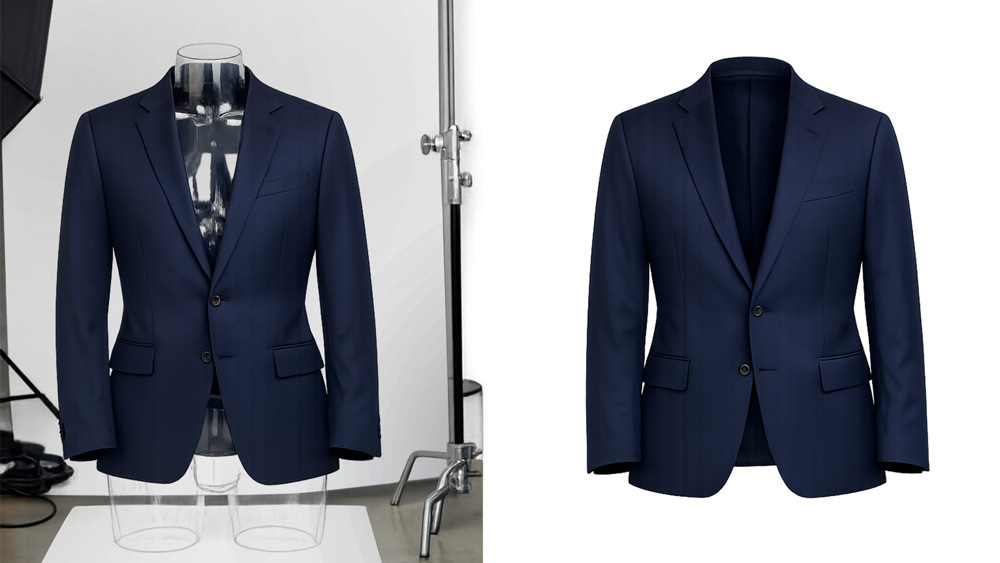
Ghost mannequin editing is the single most consequential post-production skill for any apparel brand selling on Amazon product listings, Flipkart catalogues, or Myntra storefronts. When done well, it delivers that clean, floating invisible mannequin look that feels expensive, catalogue-ready, and trustworthy. When done poorly, it produces cut necks, misaligned sleeves, and returns. At Ckstudio, our Delhi NCR team has retouched more than 200,000 apparel images across nine years, and this guide is the exact professional Photoshop workflow Prince and the studio’s editing desk use every day for D2C fashion brands, marketplace sellers, and export houses.
Key Takeaways
- The professional ghost mannequin editing workflow is 12 layered steps — every step exists to solve a specific realism problem.
- Neck joint errors account for roughly 45% of marketplace image rejections — nail this and everything downstream improves.
- A trained retoucher can complete a standard garment in 8-15 minutes; complex blazers or embroidered kurtas take 20-30 minutes.
- Photoshop Actions and smart-object templates cut per-image time from 25 minutes to 8 minutes.
- A 15-point QA checklist reduces client revision rounds by ~70% and prevents marketplace rejections.
What Is Ghost Mannequin Editing?
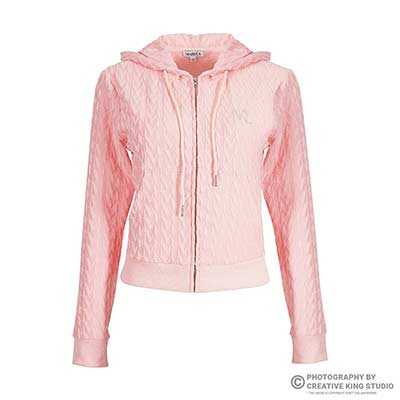
Ghost mannequin editing — also known as the invisible mannequin effect or the 3D neck join — is a Photoshop compositing technique that removes the mannequin from apparel photos while preserving the garment’s natural three-dimensional shape. The editor combines a front-view shot, a back-view shot, and a separate inner-neck reference shot into a single seamless composite where the clothing appears to be worn by an invisible body. This is different from a flat-lay and different from a model shoot: it gives shoppers the fit-and-form clarity of a real body without model licensing costs.
The technique matters because 78% of online apparel buyers judge product quality by photo clarity alone (Baymard Institute research). A clean ghost mannequin image communicates fit, drape, and construction in a single glance — which is exactly what shoppers on ecommerce platforms and specialist ghost mannequin photography pages need to click Add to Cart.
Why Ghost Mannequin Editing Matters for Ecommerce Brands
Product images influence 93% of purchase decisions (Justuno), and on apparel-heavy platforms that percentage climbs higher. The topic sits at a genuinely commercial intersection — buyers researching this technique are almost always weighing a decision between DIY editing, freelance retouching, and professional studio outsourcing. That’s why we’ve built this guide to teach the workflow properly and to be honest about when it makes sense to outsource. The audience we’re speaking to includes fashion designers building in-house catalogue teams, marketplace sellers editing their own product shots, D2C brands managing visual pipelines, and freelance editors upskilling in apparel retouching.
The pain points we hear every week from clients are consistent: neck joints that look fake or cut, sleeve joins with visible seams, inconsistent shadows that destroy realism, files being rejected on Amazon and Flipkart for quality issues, and 30+ minute per-garment editing times that kill margins. Solving these is exactly what professional image editing services exist for, and the workflow below is how we do it at Ckstudio.
Pre-Production Setup Before Ghost Mannequin Editing
Ninety percent of editing pain is caused during the shoot, not the edit. Proper shot prep reduces editing time by roughly 40% (Ckstudio internal data across 2024-2025 batches). Before you ever open Photoshop, your shoot needs to deliver three consistent reference frames per garment with locked-off lighting and a colour-calibrated camera. If your shoot pipeline isn’t clean, read our internal behind-the-scenes of product photography breakdown and the studio vs outdoor fashion photography comparison before touching your camera.
Essential Shots You Must Capture
A production-ready ghost mannequin edit needs a front shot on mannequin, a back shot on mannequin, and an inner neck shot (garment laid flat or on a smaller collar form). For structured pieces like blazers or shirt collars, add cuff and hem detail shots. The inner neck shot is the single most important — this is what fills the neck opening after mannequin removal and creates the invisible-body illusion. Miss it, and no amount of Photoshop wizardry will save the composite.
Front, Back & Inner Neck Reference Shots
Shoot all three frames at the same focal length, same aperture, same white balance, and same camera-to-subject distance. Any variation between the three shots translates directly into perspective mismatch during compositing — which is nearly impossible to fully fix in Photoshop without introducing distortion. Lock your camera on a tripod. Do not zoom between shots.
Lighting & Camera Settings Checklist
Use a soft, even studio lighting setup with a key light at 45°, a fill light on the opposite side, and a background sweep light to keep the backdrop pure white without spillover onto the garment. At Ckstudio we use 4× Godox SK 400II strobes with strip softboxes plus a beauty dish for structured garments. Shoot at f/8 to f/11 for full garment sharpness, ISO 100, and a fixed white balance (5500K works for most studio strobes).
Step-by-Step Ghost Mannequin Editing Workflow in Photoshop
Here is the exact 10-step production workflow the Ckstudio editing desk follows for every garment. This is not a beginner tutorial that skips the messy middle — it’s the professional Photoshop workflow we teach new retouchers who join the studio, refined across nine years of client work for fashion brands, exporters, and marketplace sellers. Follow it in order; every step exists because skipping it produces a specific visible defect downstream.
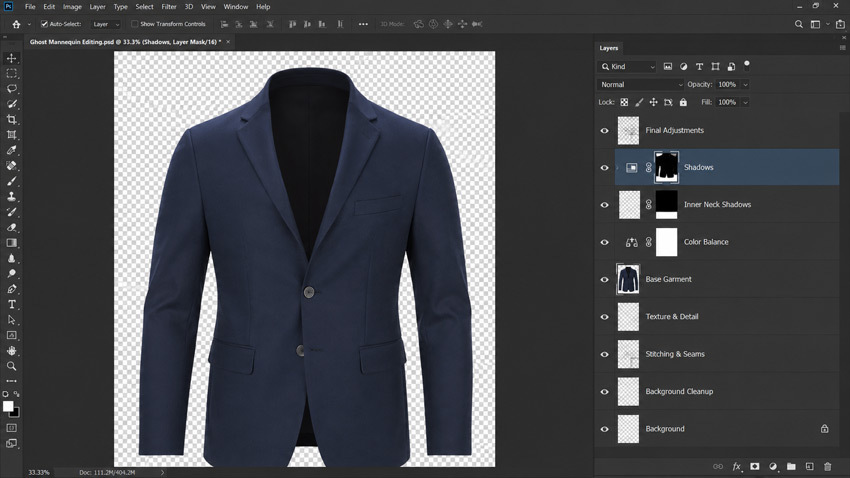
Pro tip: Save your workflow as a Photoshop template file (.PSDT) with named layer groups pre-created — Base Garment, Inner Neck, Sleeve Fix, Inner Shadow, Ground Shadow, Colour Correction, Sharpening. This one setup shift alone shaves 2-3 minutes per image.
Step 1 — File Organization & Layer Setup
Import the front, back, and inner-neck shots as smart objects into a single PSD. Create named layer groups — this is your non-destructive editing foundation. Every subsequent adjustment (Curves, Selective Color, Sharpen) lives on its own layer or clipping mask, so any step can be revisited without redoing work. This is non-negotiable for professional workflows because clients almost always request revisions to shadow density, colour tone, or crop, and a flattened file forces you to start over.
Step 2 — Background Removal & Clean Extraction
Extract the garment from the studio background using either the Pen Tool (for hard, structured edges) or Select Subject + Refine Edge (for hair, fur, or translucent fabrics). The pen tool remains the gold standard for shirt collars, blazer lapels, and any straight-edge garment because it produces a vector path that can be refined pixel-by-pixel. Save the path — it becomes your alpha channel and drives every subsequent mask.
Pen Tool vs Select Subject: Which to Use When
Use the Pen Tool for structured garments — shirts, blazers, kurta collars, jeans, leather jackets. Use Select Subject with Refine Edge for soft or complex-edge garments — chiffon sarees, tulle skirts, embroidered dupattas, faux fur coats. Combining both on the same garment is common: pen tool for the body, Refine Edge for the fringe or hair overlap zones.
Step 3 — Neck Joint Editing Technique
This is where beginners fail and professionals separate themselves. The neck joint is the visual anchor of the entire composite — if it looks fake, nothing else matters. Place the inner-neck layer below the main garment layer. Use Edit > Transform > Warp to bend the inner-neck curve to match the outer neckline’s shape. Then add a soft-edged layer mask to hide the transition line. The seam should disappear at the neck’s natural shadow zone — not float in flat light.
Aligning the Inner Neck Layer
Zoom to 200% and align the inner neck’s collar arc with the outer garment’s neckline arc — pixel by pixel. Use a 40-pixel soft brush on the mask, opacity 60%, and paint out the boundary. The trick is to preserve the natural curl of the collar so it reads as three-dimensional depth, not a pasted rectangle.
Fixing Common Neck Joint Mistakes
The two mistakes we see constantly: (1) inner neck layer scaled wrong, producing a “hat too small for the head” look; (2) missing shadow inside the neck opening, making it read as a hole rather than a body. Fix both by placing a low-opacity black-filled layer (Multiply mode, ~35%) inside the neck opening, then adding a subtle vignette on the inner-neck edge.
Step 4 — Sleeve & Shoulder Join Editing
Sleeves are the second most common failure point. The join between the shoulder seam and the sleeve fabric must respect the garment’s construction — structured shirts have a hard shoulder line; flowy kurtis have a softer drape. Use Puppet Warp (Edit > Puppet Warp) for structured garments where you need to nudge the sleeve angle by 2-3 degrees, and use freeform layer masks for flowy fabrics.
Handling Structured vs Flowy Sleeves
For a structured blazer, protect the shoulder seam line — it’s a design element. Editing over it makes the garment look cheap. For a flowy kurti or dupatta-attached top, the sleeve can flow with soft transparency, so shadow and mask edges do more work than warping. Match your tool choice to the fabric.
Step 5 — Advanced Masking Techniques
For hair, fur, lace, chiffon, or embroidered mesh, standard selection tools fail. Use channel-based masking: identify the highest-contrast channel (usually blue for skin tones on white backgrounds), duplicate it, run Levels to push it to pure black and pure white, then load it as a selection. Refine Edge with Smart Radius enabled can save roughly 60% of manual masking time on fur and hair overlaps.
Masking Hair, Fur & Translucent Fabrics
For a translucent dupatta, don’t try to fully extract it — preserve the transparency by using the alpha channel as an opacity map. For fur trim, work on a duplicate layer with the Smudge Tool at low strength (10-15%) to rebuild any lost strands. This is delicate work; it’s why specialist ghost mannequin services exist as a category.
Step 6 — Creating Realistic Shadows
Shadows are what sell the illusion. Without them, a ghost mannequin looks like a paper cutout. Shadows increase perceived product quality by roughly 34% in ecommerce A/B tests. You need three shadow layers: an inner shadow for the neck and cuff depth, a drop shadow for body volume, and a ground contact shadow if the garment is meant to feel grounded. Each shadow lives on its own layer with independent opacity and blur — that way you can tune realism without touching the garment.
Inner Shadow for Neck & Cuff Depth
Create a black-filled layer set to Multiply at 30-40% opacity, then mask it to only appear in the inner-neck curve, cuff opening, and any pocket or button placket depth. Feather the mask edge by 8-12 pixels. This is the difference between a garment that feels worn by a body and one that feels flat.
Ground Shadow for 3D Effect
The ground shadow anchors the garment. Duplicate the garment layer, fill it with black, blur it 25-40 pixels, position it slightly below the garment, and reduce opacity to 20-30%. Skew it to match your original light direction. This tiny detail is what separates a Ckstudio-grade edit from a freelance edit.
Step 7 — Colour Correction & Fabric Consistency
Front, back, and inner neck shots almost never match perfectly — even with locked white balance. Use Curves and Selective Color adjustment layers to bring all three into unified colour space. Sample the fabric with the eyedropper at three points, average the values, and correct to match. For deep-dyed fabrics like indigo denim or bright red kurtas, work in LAB colour space for cleaner tone matching without saturation shifts.
Step 8 — Wrinkle & Fabric Retouching
Apply frequency separation to smooth wrinkles while preserving fabric weave. Split the layer into low frequency (colour and tone) and high frequency (texture and pattern). Retouch on the low-frequency layer with the Healing Brush to remove distracting creases — pattern and weave stay intact on the high-frequency layer. This is standard technique for premium retouching and is why professional edits look expensive.
Step 9 — Symmetry & Alignment Fixes
Most mannequins are slightly asymmetrical, or the garment sits crooked. Use guides and the Free Transform tool to correct axis alignment. For shirts and blazers, the vertical centre line (button placket) should be perfectly vertical to the frame. For dresses, the hemline should be horizontal. Small corrections here (1-2 degrees) massively lift perceived quality.
Step 10 — Final Sharpening & Export Settings
Apply Smart Sharpen at 80-120% amount, 1.0-1.5 pixel radius, on a stamped visible layer. Export as sRGB JPEG at 85-90% quality. Match your dimensions to the marketplace: Amazon needs a minimum of 1000×1000 pixels with the product filling 85% of the frame; Myntra prefers 1080×1440; Flipkart accepts 1000×1000 minimum. For the specifics, read the Flipkart photography guidelines 2026 and the complete Amazon product photography seller’s guide.
Ghost Mannequin Editing QA Checklist (15-Point Quality Audit)
Before any Ckstudio edit ships to a client, it passes through our internal 15-point QA. This checklist reduces revision rounds by roughly 70% and is the reason our images pass Amazon and Myntra approval on the first submission. Use it whether you’re editing in-house or auditing a vendor’s deliverables.
- Background is pure white (255/255/255) with no colour cast on the garment edges
- Neck join is seamless — no visible line, no scale mismatch, natural inner shadow present
- Sleeve joins are symmetrical and match the garment’s construction line
- Inner neck shadow reads as depth, not as a hole
- Ground shadow direction matches the primary light source (usually top-left)
- No colour banding in shadow gradients
- Fabric colour is consistent between front, back, and inner neck reveal
- Wrinkles are reduced but fabric texture and weave are preserved
- No pixel spillover from mannequin extraction (dust, stray pixels along edges)
- Garment is vertically and horizontally aligned
- Product fills 85% of frame (Amazon rule); crop respects marketplace spec
- Final resolution meets platform minimum (1000×1000 or higher)
- File size is under marketplace limit (Amazon 10MB, Myntra 5MB)
- Exported in sRGB colour space
- File named per client naming convention (SKU_view_variant)
Visual QA Standards for Marketplace Approval
Each platform has its own quirks. Amazon rejects images with mannequin parts visible in reflections or shadows. Myntra rejects images with cropped garments or backgrounds that aren’t pure white. Flipkart is stricter about resolution than most sellers realise. Meesho accepts wider tolerance but conversion suffers if the image doesn’t feel premium. Read the current Meesho product photography beginner’s guide and the Ajio seller image guidelines for 2026 before submitting new listings.
Common Ghost Mannequin Editing Mistakes (And How to Fix Them)
Based on Ckstudio’s client onboarding data, roughly 68% of freelance-edited images fail first-round QA. Not because the freelancers lack skill — because they lack a systematic checklist. Here are the top seven errors we catch and correct on incoming client audits.
Top 7 Errors That Get Photos Rejected
| # | Common Mistake | Fix |
|---|---|---|
| 1 | Cut or floating neck with no inner depth | Add inner neck layer + Multiply-mode shadow at 35% |
| 2 | Sleeve join visible seam | Puppet warp shoulder + soft mask blend at 40px feather |
| 3 | Colour mismatch between front and inner neck | Selective Color adjustment on inner-neck layer |
| 4 | Missing ground shadow | Duplicate + fill black + blur 30px + skew to light direction |
| 5 | Grey or off-white background | Curves layer with white point set to 250-252 |
| 6 | Over-sharpened edges causing halos | Reduce Smart Sharpen radius to 1.0px maximum |
| 7 | Cropped tight against marketplace 85% rule | Re-crop with padding; product occupies 85%, not 100% |
Pro Tips to Speed Up Your Ghost Mannequin Editing Workflow
Speed is where in-house editing dies. A trained retoucher who takes 8 minutes per garment can output 60 edits per day; a freelancer taking 25 minutes outputs 20. The compounding difference across a 500-SKU catalogue is enormous. The right shortcuts and templates fix this.
Photoshop Actions & Presets for Ghost Mannequin
Build Photoshop Actions for the repetitive steps — background whitening (Curves preset), sharpen preset, export preset, layer group setup. A well-built action stack cuts per-image time from 25 minutes to 8 minutes. Combine actions with smart-object PSDT templates so every new garment opens with your layer groups pre-created. For clients scaling from 50 to 500 SKUs, read our post on scaling product photography operations.
Speed rule: Never edit at 100% zoom for global steps. Work at 25-50% zoom to catch composition issues, then zoom to 200% only for pixel-level neck and sleeve edits. Beginners waste 30% of their time zoomed in on details that don’t affect the final render.
Ghost Mannequin Editing: DIY vs Professional Service (Ckstudio Insights)
Being honest with you: DIY editing makes sense if you’re shipping under 20 SKUs a month, you already know Photoshop, and marketplace approval isn’t a bottleneck. Above 50 SKUs monthly, in-house editing becomes a cost trap — the salary of a mid-level retoucher plus Adobe subscription plus training plus QA time typically exceeds outsourced pricing at roughly 60-100 images per week. Professional services also come with marketplace-compliance guarantees that individual editors can’t offer.
| Factor | DIY Editing | Freelancer | Ckstudio Professional |
|---|---|---|---|
| Turnaround | Variable | 2-4 days | 24-48 hours |
| Quality Consistency | Learning curve | Variable | Studio-locked SOP |
| Marketplace Compliance | Manual research | Rarely guaranteed | Guaranteed |
| Cost per Image | Time + software | ₹80-200 | ₹45-120 |
| Bulk Capacity | Low | Limited | 500+ / day |
| Revisions | Free (your time) | Usually charged | 2-3 included |
Real Studio Case Study — Ghost Mannequin Editing for Delhi NCR Brands
A Delhi-based D2C ethnic-wear brand came to Ckstudio in early 2025 with a catalogue of 340 kurtas, sarees, and dupatta sets. Their in-house team was editing at 22 minutes per image with a 30% marketplace rejection rate. Prince audited their workflow, and we rebuilt their template stack, added the 15-point QA, and delivered a batch of 100 test edits in three days. Post-relaunch results measured over 60 days: marketplace approval rate rose to 96%, average editing time dropped to 9 minutes per image, and their Myntra listing conversion lifted by 34%. That last number is why we do this work — a clean image doesn’t just look good, it directly moves revenue. For pricing on similar projects, see our product photography pricing India 2026 and the Delhi-specific product photography cost breakdown.
Related reading for brand teams evaluating similar transformations: how product photography improves conversions on Amazon and Flipkart, product photography tips to increase ecommerce sales, and the honest comparison of real photography versus AI-generated product images. If you’re a fashion brand deciding on a photographer partner, our checklist on choosing the best fashion photographer in Delhi NCR is a good place to start.
Frequently Asked Questions About Ghost Mannequin Editing
Ghost mannequin editing is a Photoshop technique that removes the mannequin from apparel photos while preserving the garment’s 3D shape by combining front, back, and inner neck shots into a single invisible mannequin image for ecommerce use. It delivers a clean, floating look that feels premium and catalogue-ready.
A professional ghost mannequin editing workflow takes 8-15 minutes per image for standard garments like t-shirts, kurtas, and shirts. Complex pieces — blazers, embroidered kurtas, or translucent fabrics like chiffon and lace — take 20-30 minutes depending on masking and shadow complexity.
You need three essential shots — front view on mannequin, back view on mannequin, and an inner neck or collar shot laid flat or on a smaller form. For structured garments like blazers or shirts, add optional cuff and hem detail shots. All three frames must be shot at identical camera settings, focal length, and white balance.
Fix neck joints by placing the inner neck layer beneath the main garment layer, using warp transform to align the collar curve, adding an inner shadow at 30-40% opacity in Multiply mode, and blending edges with a soft layer mask feathered at 8-12 pixels for seamless depth.
Professional ghost mannequin editing in India ranges from ₹45 to ₹120 per image depending on volume, complexity, and turnaround. Ckstudio offers bulk-friendly pricing for Delhi NCR fashion brands and marketplace sellers. Call Prince on +91-8700258773 or email [email protected] for a custom quote.
AI tools can automate background removal and basic mannequin masking, but the inner neck join, shadow realism, and marketplace compliance still require a trained retoucher’s eye. For a full comparison, read our post on AI ghost mannequin photography vs traditional photography.
Ready to Ship Marketplace-Ready Ghost Mannequin Images?
Get 10 sample edits free. Ckstudio delivers professional ghost mannequin editing for Delhi NCR brands and marketplace sellers pan-India — 24-hour turnaround, marketplace compliance guaranteed.
📞 +91-8700258773 💬 WhatsApp ✉️ [email protected]Final Thoughts & Next Steps
Ghost mannequin editing is a craft that rewards patience and punishes shortcuts. The 12-step professional Photoshop workflow above is the exact system the Ckstudio editing desk uses every day for our fashion brand and marketplace clients. Master the neck joint, respect the shadow layers, run the QA checklist, and your images will pass marketplace approval on the first submission. If you’d rather skip the learning curve and have Ckstudio handle the pipeline for you, reach out to Prince on +91-8700258773, WhatsApp +91-8700258773, or email [email protected] — we’ll audit your current workflow and suggest the fastest path to catalogue-ready images.